![[PyTorch tutorial] 파이토치 설치하기](https://img1.daumcdn.net/thumb/R750x0/?scode=mtistory2&fname=https%3A%2F%2Fblog.kakaocdn.net%2Fdn%2FxxYWJ%2FbtqD6QdzTdC%2FQVw3dDecoTW0fpXtdDuQW0%2Fimg.png)
PyTorch란 무엇인가?
Python 기반의 과학 연산 패키지로 다음과 같은 두 집단을 대상으로 합니다:
- NumPy를 대체하면서 GPU를 이용한 연산이 필요한 경우
- 최대한의 유연성과 속도를 제공하는 딥러닝 연구 플랫폼이 필요한 경우
from __future__ import print_function
import torch

# 초기화 되지 않은 행렬(그 시점에 할당된 메모리에 존재하던 값들이 초기값으로 나타남)
x = torch.empty(5, 3) # 5 by 3

# 무작위로 초기화 된 행렬
x = torch.rand(5, 3)

# dtype이 long이고 0으로 채워진 행렬
x = torch.zeros(5, 3, dtype=torch.long)

# 데이터로부터 직접 텐서 생성
x = torch.tensor([5.5, 3])
#tensor([5.5000, 3.0000])

#행렬의 크기
x.size()
#torch.Size([5, 3])

#tensor의 크기(size)나 모양(shape) 변경
x = torch.randn(4, 4)
y = x.view(16)
z = x.view(-1, 8)  # -1은 다른 차원들을 사용하여 유추합니다.
print(x.size(), y.size(), z.size())
#torch.Size([4, 4]) torch.Size([16]) torch.Size([2, 8])- torch 는 사실 튜플(tuple)과 같으며, 모든 튜플 연산을 지원합니다.(출처 : PyTorch Docs )
Numpy와 Torch
- Torch Tensor를 NumPy 배열로 변환하기
a = torch.ones(5) #torch
b = a.numpy()
#[1. 1. 1. 1. 1.]
#위와 같이 복사한 개체는 값이 같이 바뀜
a.add_(1)
print(a)
print(b)
#tensor([2., 2., 2., 2., 2.])
#[2. 2. 2. 2. 2.]- NumPy 배열을 Torch Tensor로 변환하기
import numpy as np
a = np.ones(5)
b = torch.from_numpy(a)
np.add(a, 1, out=a)
print(a)
print(b)
#[2. 2. 2. 2. 2.]
#tensor([2., 2., 2., 2., 2.], dtype=torch.float64)
CUDA tensors
# 이 코드는 CUDA가 사용 가능한 환경에서만 실행합니다.
# ``torch.device`` 를 사용하여 tensor를 GPU 안팎으로 이동해보겠습니다.
if torch.cuda.is_available():
    device = torch.device("cuda")          # CUDA 장치 객체(device object)로
    y = torch.ones_like(x, device=device)  # GPU 상에 직접적으로 tensor를 생성하거나
    x = x.to(device)                       # ``.to("cuda")`` 를 사용하면 됩니다.
    z = x + y
    print(z)
    print(z.to("cpu", torch.double))       # ``.to`` 는 dtype도 함께 변경합니다!
튜토리얼 시작하기
torch 설치
#Linux 환경 terminal
#기존에 있는 환경을 복사한 후 사용
$ cp -r anaconda3/envs/jh anaconda3/envs/jh-torch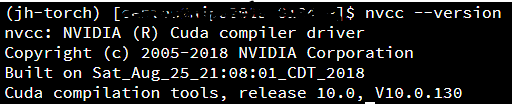
$ source activate jh-torch- nvcc --version : 쿠다 버전 확인
$ conda install -c pytorch magma-cuda100- 작업 폴더로 이동하여 git clone
$ git clone --recursive https://github.com/pytorch/pytorch- 권한 설정(optional) 후 폴더로 이동
$ chmod -R 777 pytorch
$ cd pytorch
$ git submodule sync
$ git submodule update --init --recursive- PyTorch 설치
$ export CMAKE_PREFIX_PATH=${CONDA_PREFIX:-"$(dirname $(which conda))/../"}
$ python setup.py build --cmake-only
$ ccmake
torchvision 설치
- 위 conda 환경 유지한 채로
$ conda install torchvision -c pytorch
'Undergraduate > ML & DL' 카테고리의 다른 글
| [Face Recognition] 얼굴 인식 출입, 어떻게 하는걸까? (0) | 2020.05.20 |
|---|---|
| [PyTorch tutorial] 컴퓨터 비전(Vision)을 위한 전이학습(Transfer Learning) (0) | 2020.05.14 |
| [GPU] 다수의 GPU 중 원하는 GPU 타겟팅하기 (0) | 2020.05.13 |
| [PyTorch tutorial] PyTorch에서 GPU 활용하기 (0) | 2020.05.12 |
| [PyTorch tutorial] 파이토치로 딥러닝하기 : 60분만에 끝장내기 (0) | 2020.05.12 |